Race Setup Guide
This guide covers the essential steps to prepare your Pinewood Derby race roster, including managing dens, adding racers, and assigning car numbers.
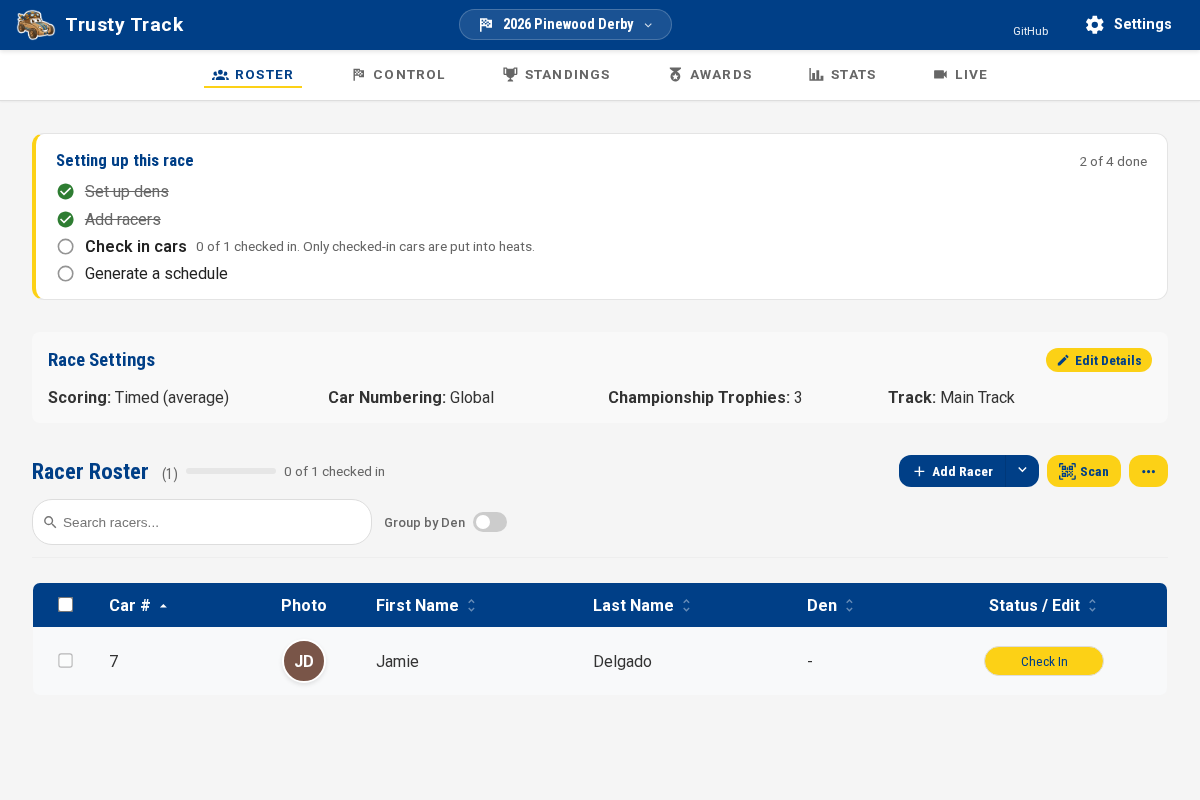
The Roster page
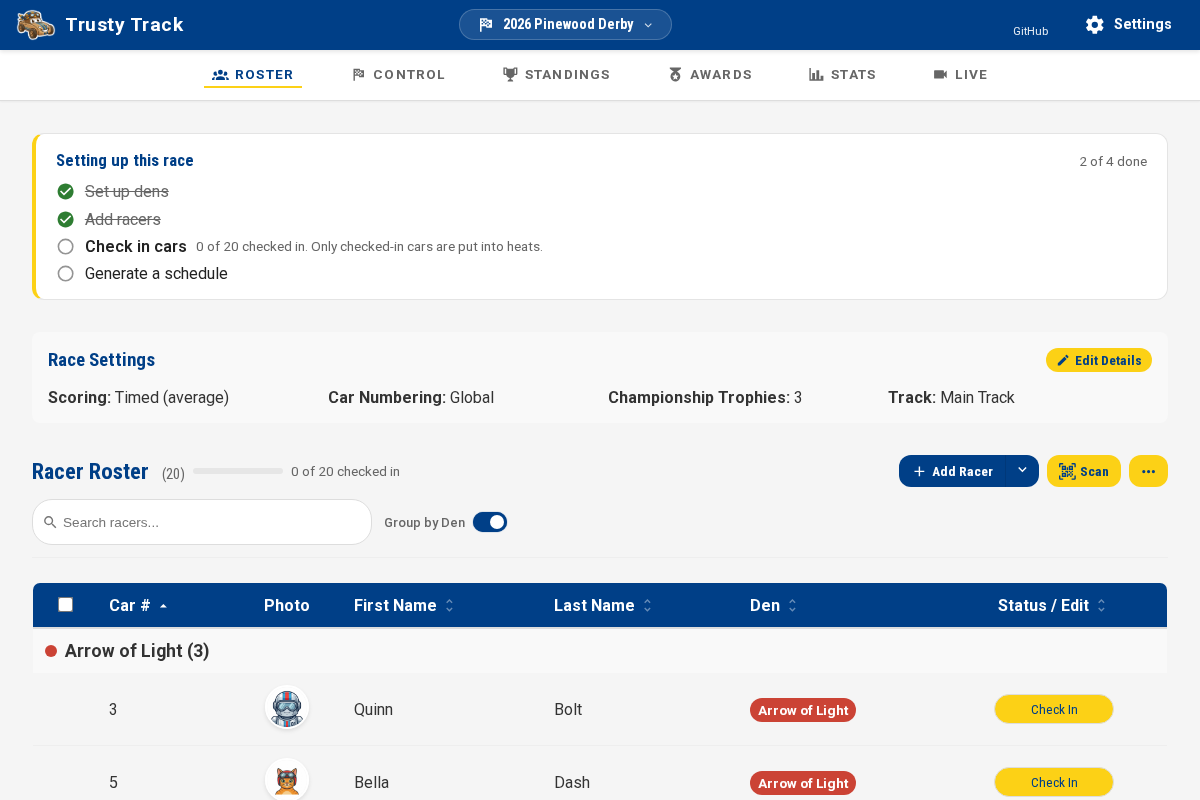
Once you have created or selected a race from the Home page, you will be taken to the Roster page — the first tab in the race navigation. This is your central hub for roster management.
Sorting the roster
Click any column header — Car #, First Name, Last Name, Den, or Status / Edit — to sort by it, and click it again to reverse. The roster starts in car number order, with racers who have no number yet at the end, where they are easy to find.
Sorting by Status / Edit is the one worth remembering on race morning: it brings the racers who are not yet checked in to the top, which is the question a queue at the desk keeps asking.
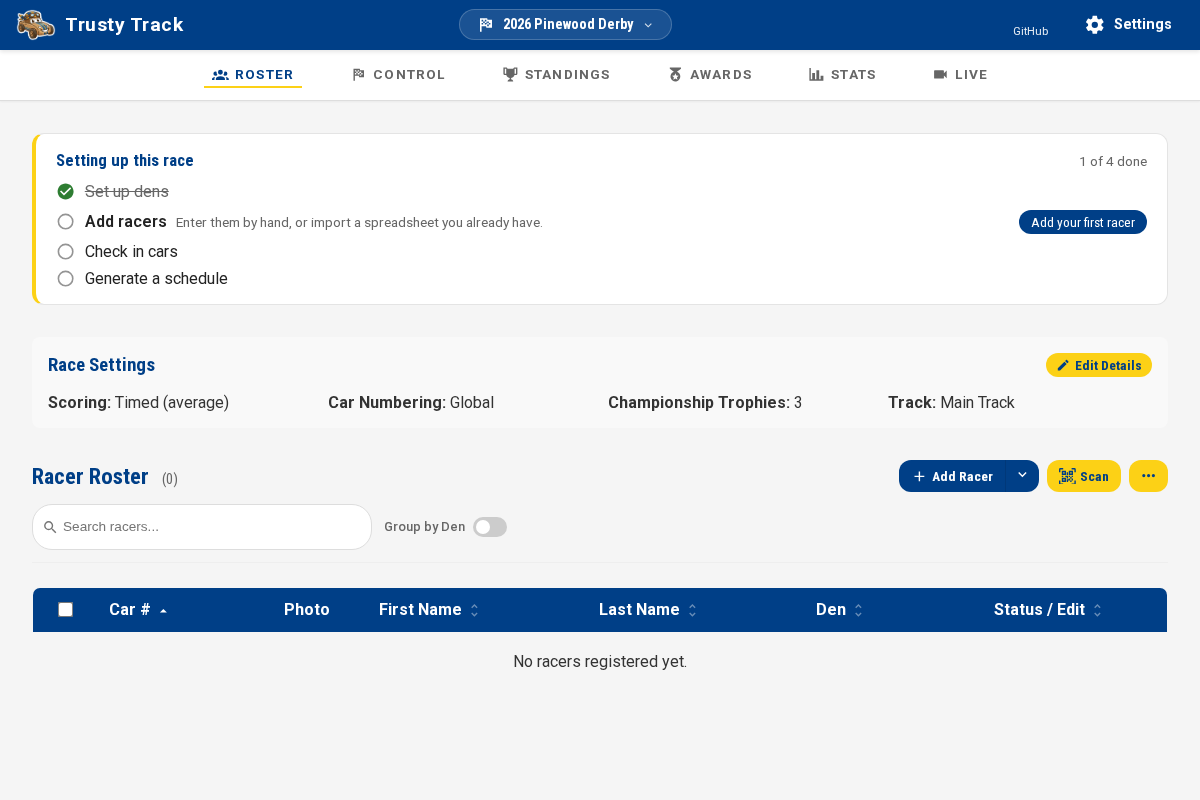 The Roster page provides a summary of race settings and the current racer roster. On a race that is not yet set up, the checklist described in the getting started guide sits above them.
Managing Dens
Dens are the sub-groups within your race (e.g., Lions, Tigers, Wolves). Trusty Track uses them to divide the roster up — for a round raced by one den, for a championship that takes the top few from each den, and for car number ranges.
A race created with the setup wizard already has its dens — the six Cub Scout ranks, or whatever you adjusted that list to, or last year's copied over. This is where you change them afterwards, or add them for a race that started with none.
Opening Den Manager
Click the ⋯ button at the top right of the roster and choose Manage Dens.
The overflow menu holds the things you do once before an event — managing dens, uploading photos and printing. Add Racer and Scan, which you reach for repeatedly, stay on the toolbar itself.
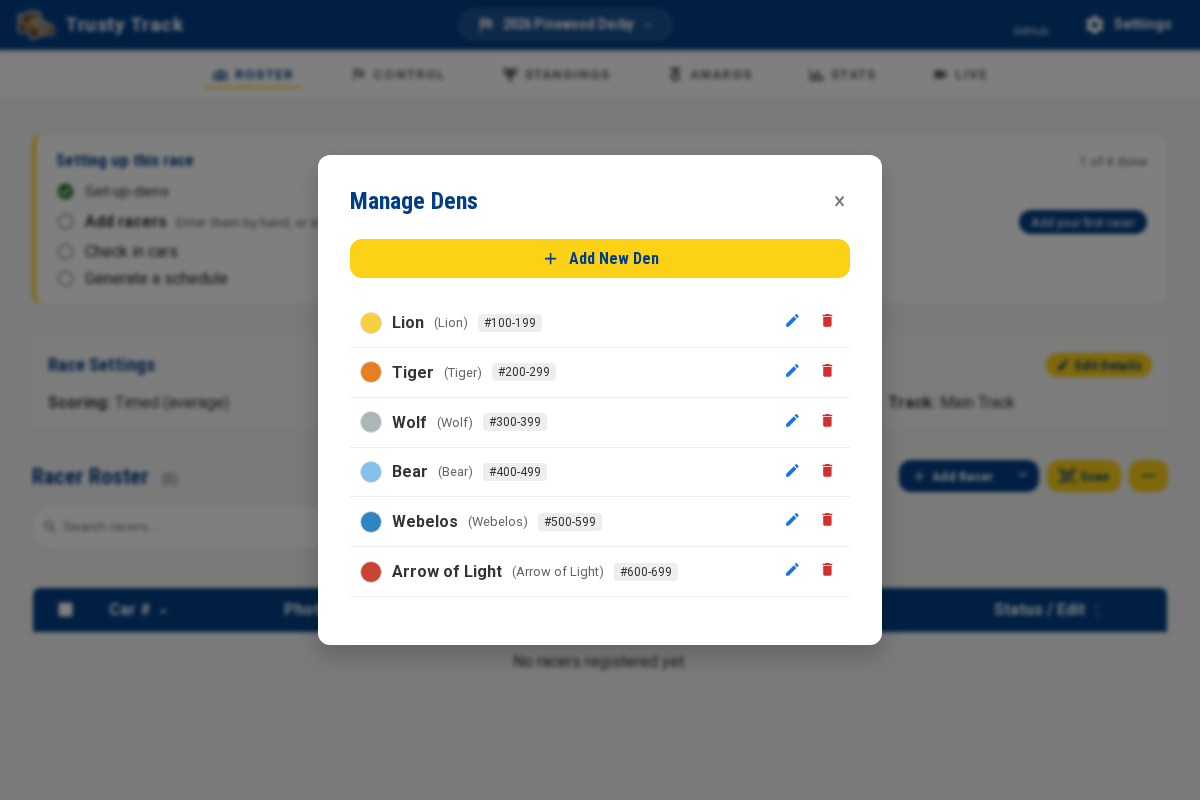
Adding a New Den
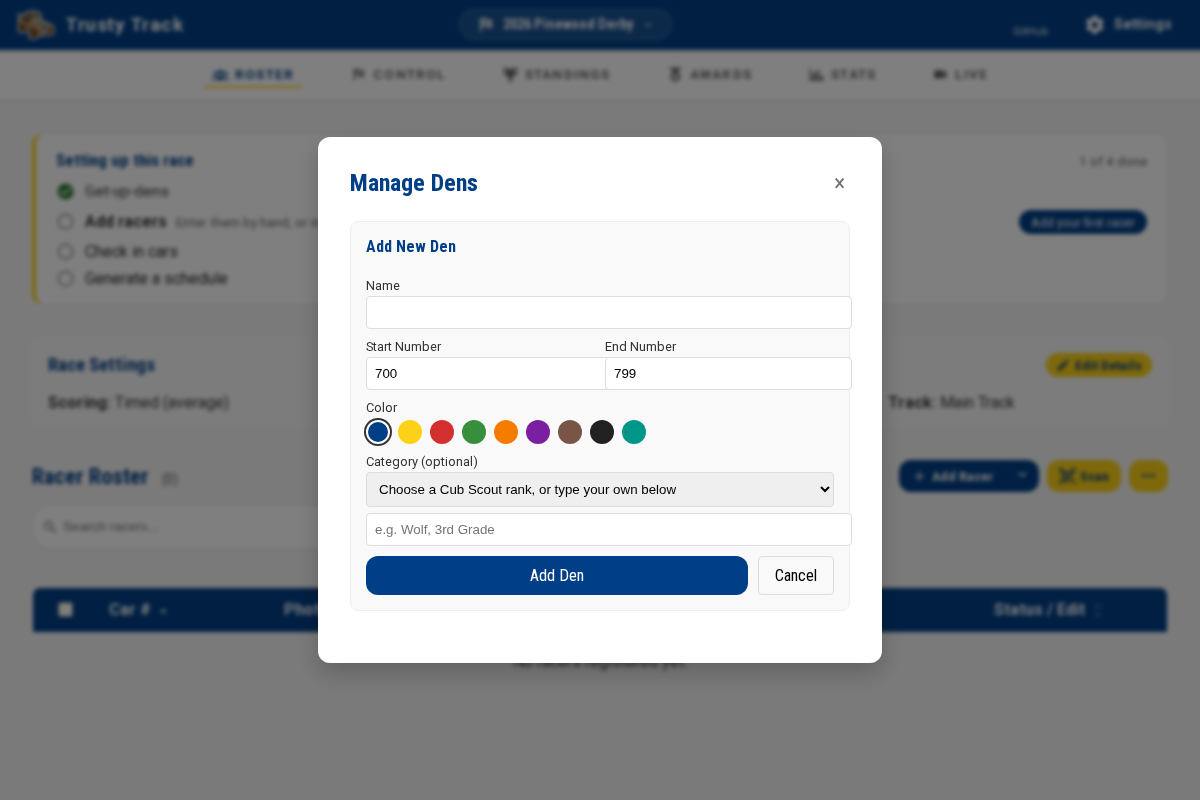
- Click + Add New Den.
- Enter the Name (e.g., "Lions").
- Check the Start Number and End Number. They arrive filled in with a block of a hundred that no other den is using, and Auto number hands out numbers from that block when the race is set to Per Den numbering. Clear them if you number cars some other way.
- Select a Color to identify the den. It is the colour of the den's tag in the roster, on printed pit passes and licences, and in the den comparison on the Stats page.
- (Optional) Set the den's Category — a dropdown offers the traditional Cub Scout ranks (Lion, Tiger, Wolf, Bear, Webelos, Arrow of Light) to fill the box, or type anything you like. It is shown beside the den's name in the list, beside the den's name in the Den column on the Standings page, and beneath a racer's name on the audience displays, where their den is not otherwise shown.
- Click Add Den.
Adding Racers
You can add racers one by one for small events or late registrations, or bulk-import a full roster from a CSV file, a GrandPrix Race Manager database, or a DerbyNet database.
Manual Addition
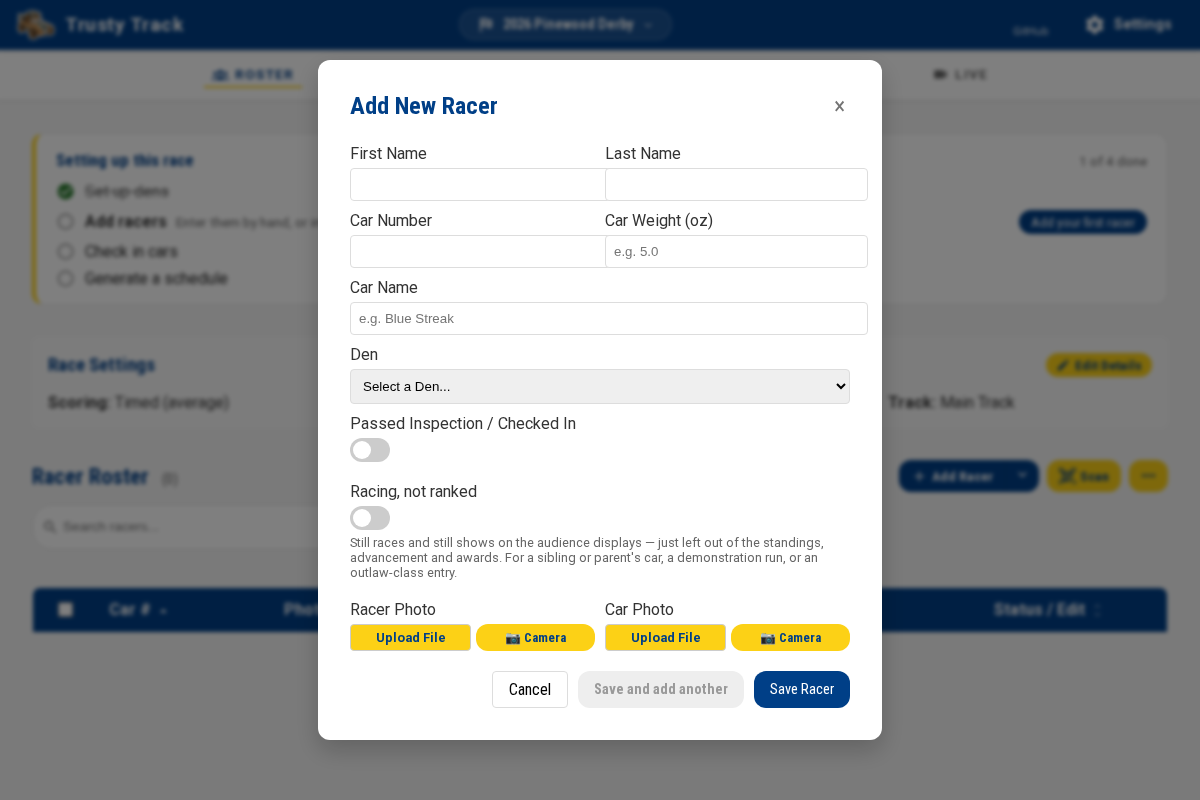
- Click the Add Racer button. (The arrow beside it is for the other ways in — Import from CSV, Import from GrandPrix Race Manager, Import from DerbyNet, and Populate Test Data.)
- Enter the racer's First Name and Last Name.
- Enter a Car Number (if not using Auto number later).
- Select the appropriate Den. Car Name, Car Weight and a photo can all be filled in now or left until check-in. A photo taken or uploaded here can be straightened and cropped the same way as at check-in — see Straightening a Photo.
- Click Save Racer — or Save and add another, which saves this racer and hands you the form back for the next one.
Save and add another is for typing a roster in at a sitting. It keeps the den you were working through, since rosters usually arrive grouped that way, and clears everything else. The car number is deliberately not carried forward or incremented: under manual numbering, the next car is not reliably the last one plus one, and a wrong number that looks deliberate is worse than a blank one.
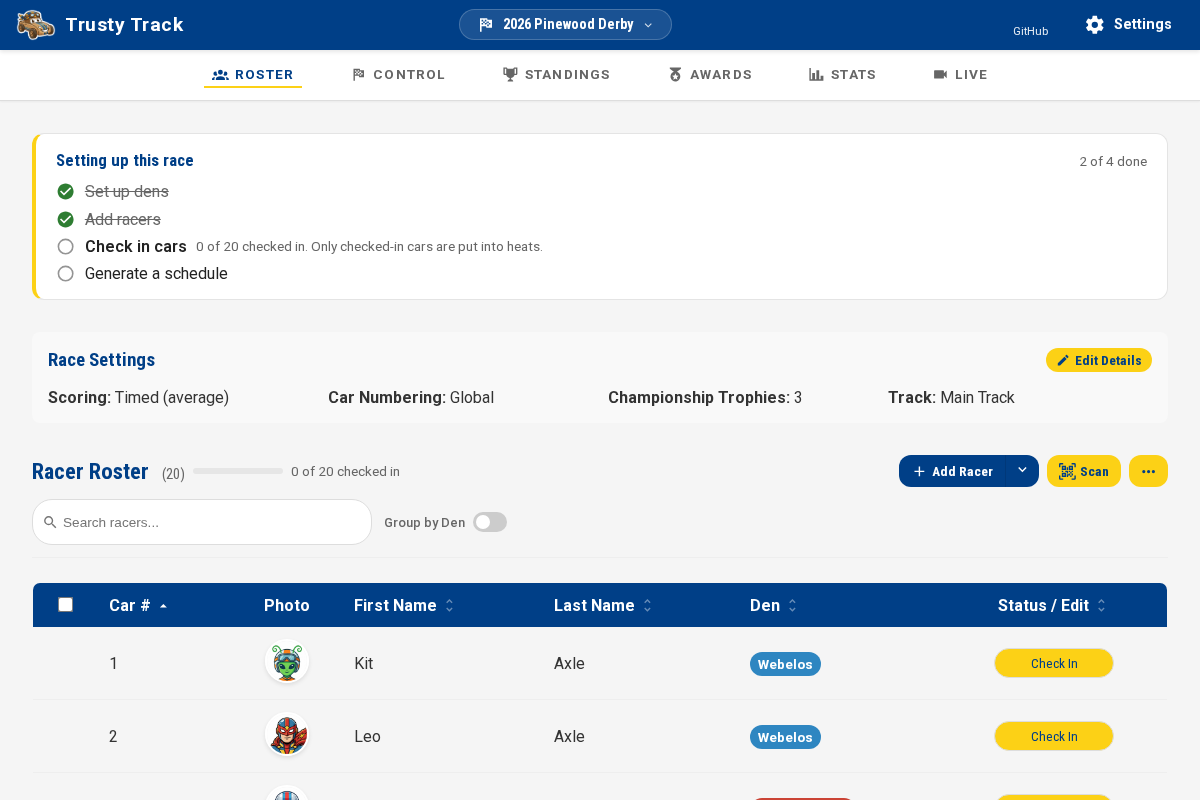
The racer will now appear in your roster.
Batch Import from CSV
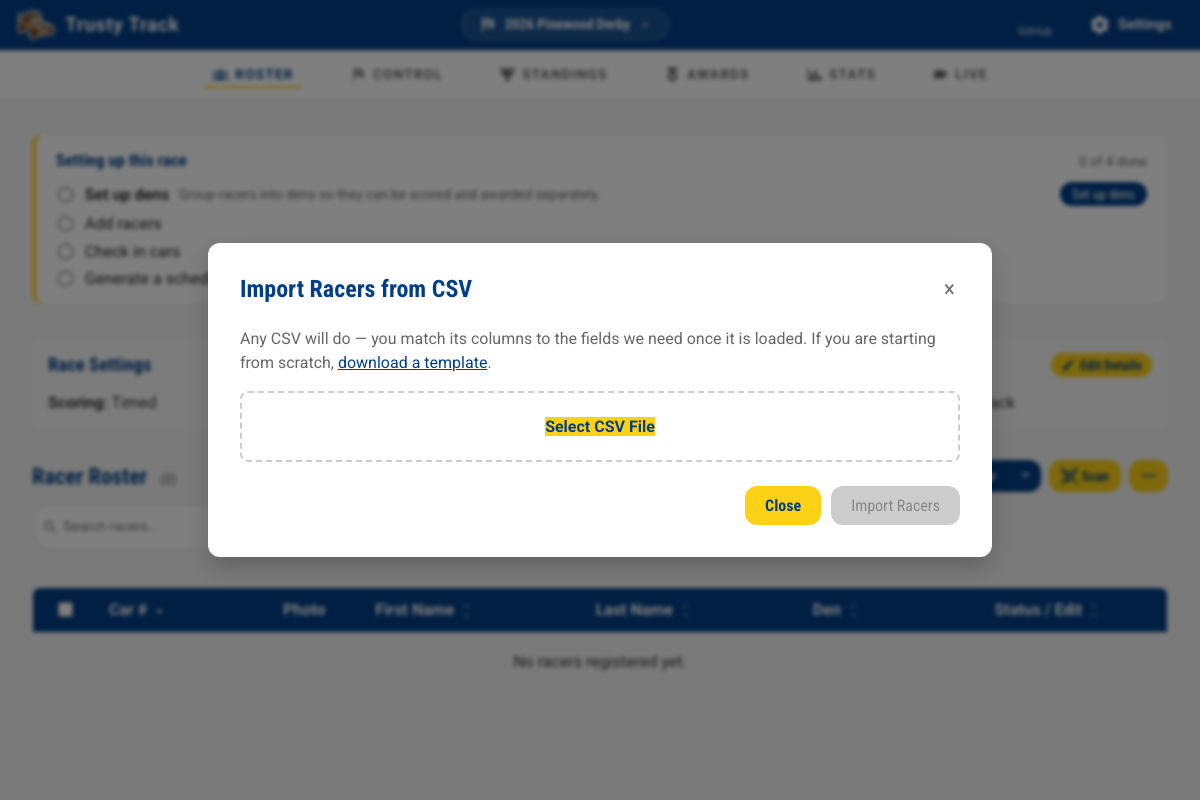
If you have a large roster (e.g., exported from Scoutbook or a spreadsheet), you can import it in seconds.
Your file does not have to be in any particular format — you match its columns to the fields Trusty Track needs, so a roster exported from Scoutbook or a spreadsheet someone has been keeping by hand will both work as they are.
- Click Select CSV File and choose your file. If you are starting from scratch, use download a template for a file with the right columns already in it.
-
Check the Match your columns section. Trusty Track guesses from your headers —
Scout First Name,Car #andfirst_nameare all recognised — but you can change any of them, or set one to Not included.First Name and Last Name are required; Car Number, Car Name, Den and Passed Inspection are optional.
-
Look over the Preview, which shows the first few rows exactly as they will be imported.
- Read any warnings. Trusty Track points out rows missing a name, car numbers that are not numbers, and car numbers used twice, before anything is saved.
- Click Import Racers.
Any dens named in the file are created automatically and the racers assigned to them.
Importing from GrandPrix Race Manager
If your pack has run past events in GrandPrix Race Manager (GPRM), you do not have to retype years of rosters, car numbers and den assignments.
- From the arrow beside Add Racer, choose Import from GrandPrix Race Manager.
- Click Select GPRM Database and choose the file. GPRM (version 18, from 2018, or later) keeps its roster as a single SQLite file, usually under Documents > Lisano Enterprises > GrandPrix Race Manager > Data. An older GPRM saves an Access database instead (
.mdb) — Trusty Track cannot read that format directly, and will tell you to open it in a current version of GPRM, which re-saves it as SQLite. - Trusty Track reads the file and shows you a preview — every den and racer it found, and any car numbers already used twice, either within the file or by someone already on your roster — before anything is saved.
- Click Import N Racers.
The mapping from GPRM's own tables to a Trusty Track roster is worked out from GPRM's database structure, not confirmed against every version of GPRM in the field — so it is worth checking the preview against what you expect before importing, the same as you would with a CSV. Dens named in the file are created automatically, matched to an existing den of the same name where one already exists.
GPRM keeps racer and car photographs as separate files rather than inside the database, so they do not come across with the import — you will need to add photos again through Add Racer, editing a racer, or the roster's photo upload tool, the same as with a CSV import.
Importing from DerbyNet
If your pack has run past events in DerbyNet, its database can be read the same way — DerbyNet and GrandPrix Race Manager share the same underlying table structure, so dens, car numbers and passed-inspection status all come across in one step.
- From the arrow beside Add Racer, choose Import from DerbyNet.
- Click Select DerbyNet Database and choose the file — a single SQLite file, from DerbyNet's Administer Race page's Backup Database link, or the file in its own data directory.
- Trusty Track reads the file and shows you a preview — every den and racer it found, and any car numbers already used twice, either within the file or by someone already on your roster — before anything is saved.
- Click Import N Racers.
The mapping from DerbyNet's own tables to a Trusty Track roster is worked out from DerbyNet's database structure, not confirmed against a real DerbyNet installation — so it is worth checking the preview against what you expect before importing, the same as you would with a CSV or a GPRM database. Dens named in the file are created automatically, matched to an existing den of the same name where one already exists.
DerbyNet keeps racer and car photographs as separate files rather than inside the database, so they do not come across with the import — you will need to add photos again through Add Racer, editing a racer, or the roster's photo upload tool, the same as with a CSV import.
Acting on several racers at once
Tick the checkboxes on the left of any rows you want to change. A bar appears above the table showing how many you have selected and what you can do with them.
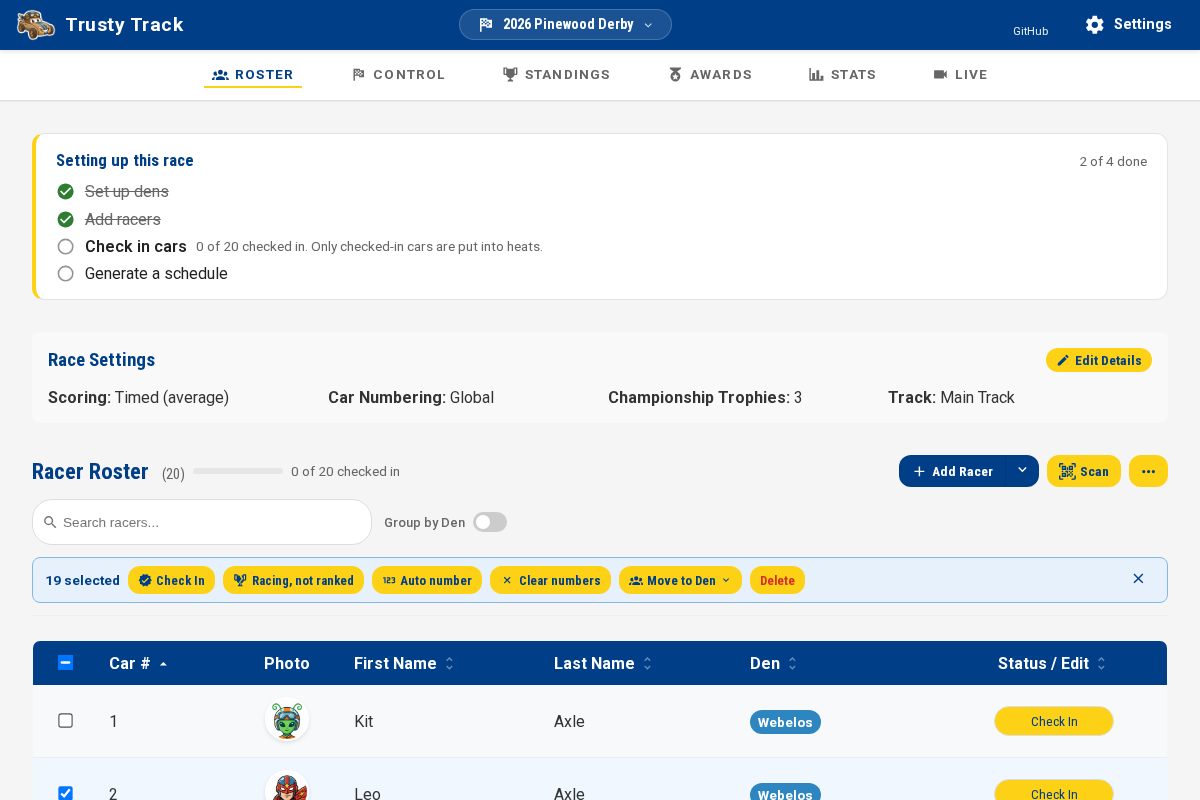
- Check In: Mark the selected racers as passed inspection and checked in.
- Racing, not ranked: Mark the selected racers as racing but not competing for a trophy — a sibling or parent's car, a demonstration run, an outlaw-class entry. They still get heats, still show on the audience displays, and their times are still recorded; they are only left out of the standings. See Racing without being ranked.
- Auto number: Assign car numbers to the selected racers, following the race's Car Numbering setting — sequentially from the global start number, or from each den's own range. A race set to Manual numbering is left alone.
- Clear numbers: Remove car numbers from selected racers.
- Move to den: Batch change the den assignment for selected racers, or move them to Unassigned.
- Delete: Remove selected racers from the race.
Check In, Racing not ranked, Auto number and Move to den leave your selection in place afterward, so you can select a group once and run through several of them in a row — select everyone, auto-number, then check them in, without re-ticking anything in between. Clear numbers and Delete clear the selection instead, since both remove something rather than adding to it.
The ✕ on the right clears the selection and puts the bar away.
Final Roster Review
Before moving to the "Control" phase, review your roster to ensure every racer is assigned to the correct den and has a unique car number.
Tip
Turn on Group by Den above the roster to check each den in turn, and use the search box to find a racer by name, car number, or den.
Printing for Race Day
With the roster settled, print the paperwork before doors open — pit passes, driver's licences, and the check-in codes an operator can scan. See the Printables guide.