Scoring & Championships
Two decisions shape your race day: how scores are counted, which you pick when you create the race, and what happens after everyone has raced — finals, a per-den championship, a fun round for the slowest cars, or nothing at all. This page helps you choose, and shows how to set each one up.
The Race Day guide is the start-to-finish walkthrough. The exact rules behind everything here are in the reference: Scoring, Round styles, and Championship rounds.
Choosing how to score
Four methods, each with its own one-line description right on the race form. Every one is lower-is-better, and which to pick comes down to two questions: do you have a timer, and do you want a car's whole morning to count, or just its best moment?
Timed — the usual choice
Every car's score is its average time, and the fastest average wins. Pick this if you have an electronic timer (including the built-in practice timer). It is the default for good reasons:
- The averages stay fair even when things go sideways — a late arrival, a lane that stops working — because an average does not care how many heats each car ran.
- Exact times make ties rare, and give every family a number to take home ("3.042 seconds!").
If a car leaves the gate but never reaches the finish — a wheel comes off, it jumps the lane — that heat is counted as a slow time (9.999 seconds) rather than being thrown away. One bad run hurts, but it does not ruin a whole morning of good ones.
Points — for racing without a timer
Every car's score is its finishing places added up — 1st place is 1 point, 2nd is 2, and the lowest total wins. Pick this if you have no timer: all you need is somebody at the finish line calling the order, typed straight into the race screen. Set the track's Timer Type to No timer (see Race and Track Settings) and that becomes the main way results are recorded, rather than a fallback behind a timer that never arms.
Two things to know about points, both handled for you:
- A car that breaks down mid-heat, or sits out a heat you skipped, is counted as last in that heat. Without this, missing a heat would actually improve a score, since fewer places means a lower total.
- If some cars end up racing fewer heats than others — a lane stopped working mid-round, or a racer arrived late — that round is set aside from the trophy standings, and the Standings page tells you so. Timed races keep such rounds, because averages stay fair.
Cumulative time — every heat, added up
Every car's score is its heat times added together rather than averaged, and the lowest total wins. It needs a timer, the same as Timed, and it looks similar on an ordinary race day: while every car runs the same number of heats, a total and an average rank cars identically. Pick it if your pack wants the number on the trophy to be "how much time this car spent on the track altogether" rather than an average — some packs simply prefer a running total to a per-heat number.
The trade-off is the reason Timed is the default and Cumulative time is not: a total, unlike an average, does care how many heats each car ran. If a lane goes out of service or a racer arrives late, a round like that is set aside from the standings, the same as under Points — see Rounds that are set aside.
Fastest single run — the traditional pinewood answer
Every car's score is its single best recorded time — what most packs mean when they say "fastest run wins." A car that's quick once and unlucky twice places on the once; the other heats simply don't count against it. Needs a timer.
- A bad run — a wheel comes off, the car jumps the lane — is not penalised at all, because it was never a candidate for the racer's best time.
- A car that never finishes a single heat has no time to offer, and sorts below every car that finished at least one — never finishing is worse than a bad average, not merely absent from it.
- Like Timed, it doesn't care how many heats each car ran, so a lane outage or a late arrival never sets a round aside.
The exact rules for all four are in Scoring.
Dropping each car's worst run
Next to Scoring on the race form is Drop worst run(s) — 0 by default,
meaning off. Set it to 1 or more and each car's worst counted results are
set aside before scoring, under whichever of the four methods you picked.
It's the honest version of what Timed, Points and Cumulative time already do about a bad run. Today, without it, a DNF is scored as a flat 9.999-second penalty, or as last place — a number invented because the scoring math needs one. Turn dropping on, and the run a wheel came off in is usually the run that gets dropped: rather than inventing a bad number for it, the car is scored on the heats it actually finished, as though the bad one had never been scheduled.
Two things worth knowing before you turn it on:
- It only fires once every car who has raced has the same number of counted heats, with at least one to spare. If a lane outage or a late arrival has left the field uneven, nothing is dropped, and the standings say so — dropping one run each from cars with different heat counts would just move the unfairness Points and Cumulative time already guard against one heat later, so Trusty Track refuses to do it.
- It does nothing under Fastest single run. That method already keeps only a car's best time; there is no "worst" left to drop that could ever change which one that is.
The exact rule is in Drop the worst run.
When two cars tie
They share the rank — 1st, 1st, 3rd — and the Standings page shows it that way. Ties happen a lot with points and only rarely with times.
Whether anything beyond that gets decided is up to the race's Tiebreaker setting, next to Scoring on the race form. The default, Leave it shared, is a judgment call left to you, same as always: settle it with a race-off, or by correcting a time if one was recorded wrong.
If you'd rather Trusty Track settle it automatically, which of the other four to pick depends on how the race is scored:
- Timed, Cumulative time, and Fastest single run races usually want Fastest single heat — the traditional pinewood answer, and what most packs mean by "fastest run wins" — or Lowest total time if consistency across every heat should count for more than one great run.
- Points races with a timer running can use either of those too, since a time is still being recorded even though it is not the score.
- Points races on a track with no timer — see No timer — have no time to compare, so Fastest single heat and Lowest total time will never fire. Countback (most 1st places, then most 2nds…) is the one that works from places alone, which every points race has whether or not a timer is running.
- Head-to-head suits a small, close field — den-sized rounds where the tied cars are likely to have actually raced each other more than once. In a large field it resolves less often, since two tied cars may never have shared a heat.
Whichever is picked, a tie the method cannot settle — identical times, cars that never met, no data at all — is reported rather than guessed at. The full rules are in When two cars tie.
What the Standings page shows
The overall standings cover the rounds that everyone races. A final does not feed back into them — the cars in the final were chosen from those standings, so its times are shown separately: use the dropdown above the table to look at any final on its own. Elimination rounds get the same treatment, each with its own page in the dropdown. A round set aside in a points race — where some cars ran fewer heats than others — is different: it stays folded into Overall rather than getting a page of its own, and the Standings page shows a banner explaining why it isn't counted. The full list of what counts and what does not is in Scoring.
Choosing how a round is raced
When you add a round that everyone races, the Add Round dialog asks How it's raced. Three choices:
| Choice | How it works | Good for |
|---|---|---|
| Everyone races in every lane | The whole schedule is made up front; every car gets a turn in every lane | Most races — the fairest comparison, and the one to pick if in doubt |
| Balanced | First heats are random; after that, cars doing about as well race each other | Making sure more children get a heat they can win |
| Elimination | Lose too many heats and you're out; last car left wins | Drama — or a fun second event after the main racing |
For both Balanced and Elimination, just run whatever heats are on the screen; when they are done, the next set appears by itself. A racer who checks in late is simply included in the next set. The Race Day guide shows how to set each one up, and the full rules are in Round styles.
Championship options
After the main racing, you can hold one or more rounds for the best cars. None of this is required — a race with no championship round simply ends with the standings.
Setting one up: either in the Round Wizard when you first build the schedule, or later with Add Round on the Schedule tab — pick the Championship Round tab in the dialog. Either way, you choose where its racers come from and how many:
- The fastest overall — the top cars in the whole pack race a final. The most common setup: one final, three or four cars.
- The fastest from each den — the top cars from every den race together. Good when dens race separately in the main rounds and the champions have never met.
- The top finishers of another championship round — this is how you build "top ten race a semifinal, then the best three of them race the final". In the wizard, every championship round after the first does this automatically; with Add Round, pick the earlier round from the list. The last cars standing from an elimination round can feed a final the same way.
You do not have to decide any of this before racing starts. A championship round added part-way through the day works exactly the same — and if the racing that decides it is already finished, it fills in with the right cars immediately.
Things the app takes care of
- The right cars appear on their own. An undecided lane is a placeholder rather than a blank — see How the line-up fills in for what each screen shows — and it fills itself the moment the racing that decides it is finished, no button to press.
- Fixing a time fixes the final. A championship round not yet raced re-picks its cars; one already raced shows a Line-up out of date badge instead, so you decide.
- If a qualifier leaves early, un-check them at the check-in screen and the next car in the standings takes their spot — as long as that round has not been raced yet.
The full rules are in Championship rounds.
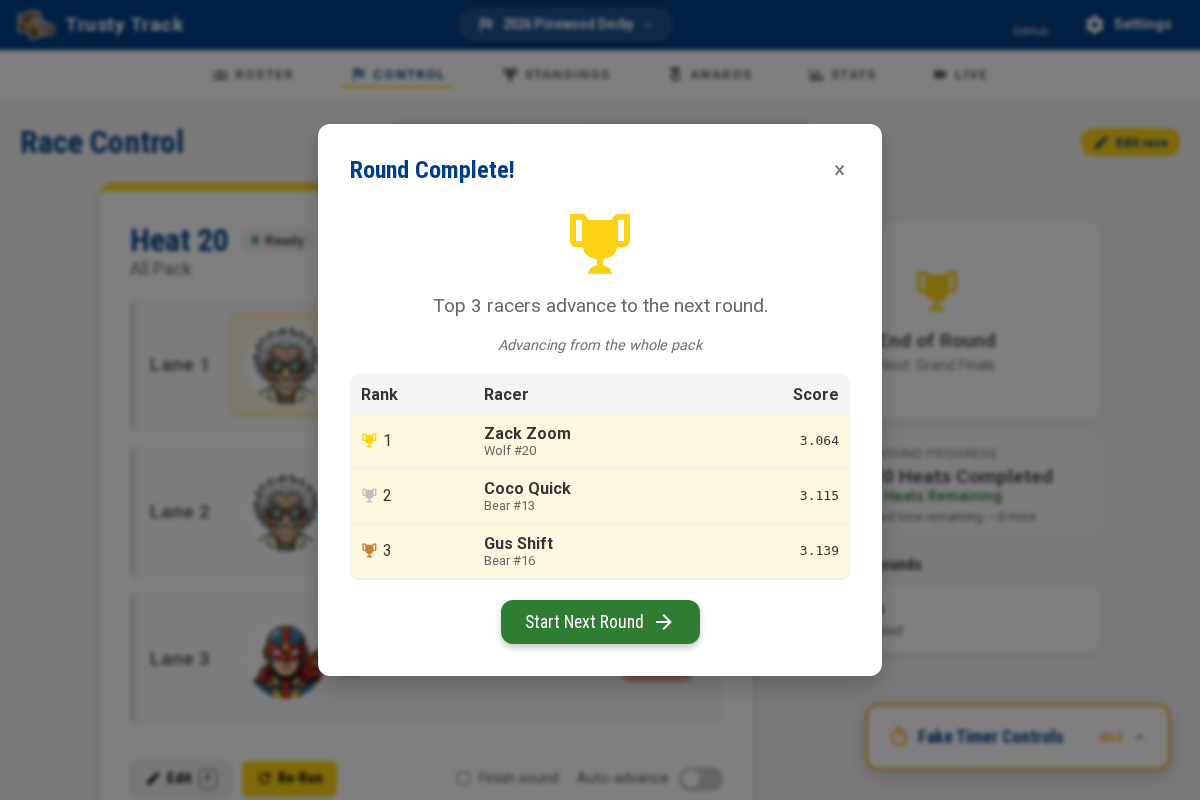 When the racing that decides a championship round finishes, this summary
lists who made it, with their scores.
When the racing that decides a championship round finishes, this summary
lists who made it, with their scores.
The Slowest Race
A crowd favorite to end the day: a round for the slowest cars, where the last one down the track wins. Set it up like any championship round, but choose The slowest cars instead of the fastest. Cars that never recorded a time are left out — not racing is not the same as being slow — and its page on the Standings dropdown lists the slowest car first, because that is the winner. See the Slowest Race for the walkthrough.
Standings and trophies are different things
The Standings page is the ranking. The Awards page is the hardware — and it is where "how many trophies" actually lives. Speed awards like Fastest Car or Fastest Wolf are always worked out from the standings as they are right now, so correcting a time moves the trophy with it, right up until you announce it. Judged awards like Best Paint are chosen by people and never move on their own.
One number that trips people up: Championship Trophies on the race settings decides how many cars go into the final — it is about the racing, not about how many physical trophies you hand out. The trophies themselves are whatever you create on the Awards page.